
 1327
1327
Create, change, or customize a view
Outlook for Microsoft 365 Outlook 2021 Outlook 2019 Outlook 2016 Outlook 2013
Views give you different ways to look at items in a folder. Each Outlook folder, such as Inbox and Calendar, allows you to customize your view to change the organization of items, fonts, and many other settings.
The most common change to make to a view is to change the font size in the message list, the Reading Pane, or when composing a message.
Change the font or font size in the message list
-
Select View > View Settings.
-
Select Other Settings in the Advanced View Settings box.
-
Select Column Font or Row Font.
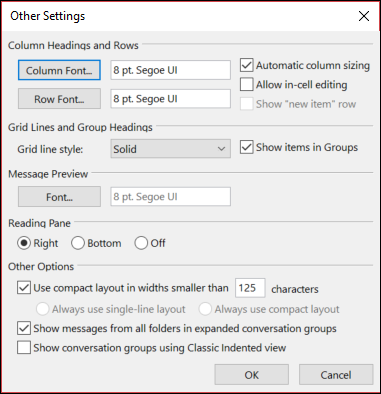
Note: To change the font size of the message preview, sender name, and subject in the default Inbox view, choose Row Font.
-
Select the font, font style, and size you want, then click OK three times to save your settings and apply your changes.
Note: If you only want to change the font or font size for the message preview (the line of message text you see under the subject and sender, select Font under Message Preview.
Change your font or font size in the Reading Pane
The Reading Pane doesn't allow you to change the default font or font size. However, you can zoom in or zoom out easily. You can also tell Outlook to display all of your email messages in plain text, and have more control over the font size.
If you're an Microsoft 365 subscriber, you can select a zoom percentage that persists across all of the messages you read.
-
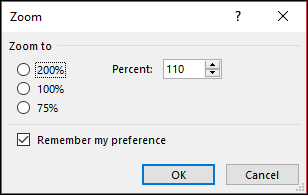
At the bottom right corner of the Reading Pane, click the percentage (usually 100%) to display the Zoom While Reading dialog box.
-
Choose one of the default percentages or enter your own percentage. Select the Remember my preference checkbox to keep your zoom level the same across all messages you receive.
If you're not an Microsoft 365 subscriber, the Zoom percentage will not save from one message to the next. Every time you switch messages in the reading pane, you'll need to zoom in or out. To change your zoom percentage, use the following steps.
-
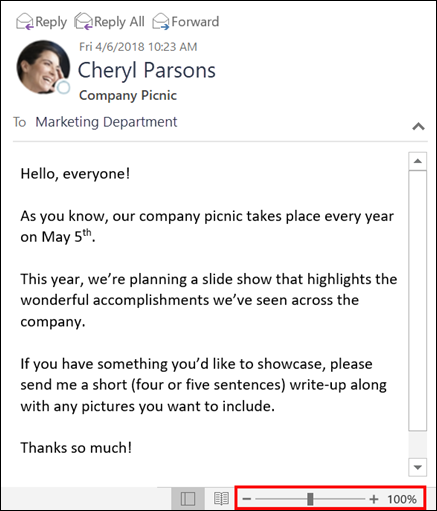
To zoom in or out in the Reading Pane, look for the magnification slider at the bottom right corner of the Reading Pane.
-
Move the slider left or right to change the size of the text in the Reading Pane.
Note: Any change you make to the zoom level only persists while you're viewing the message. If you select a different message, the zoom percentage will return to 100%. If you click back to the first message, the zoom percentage isn't saved.
Change the font size for messages when composing, replying, and forwarding
To change the font size for messages when composing, replying, and forwarding, use the following steps.
-
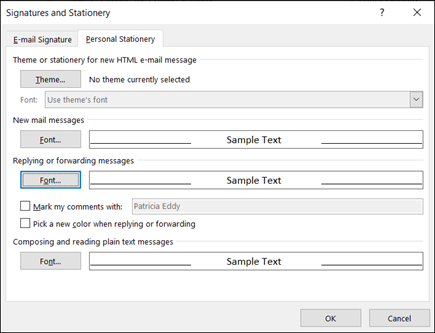
Select File > Options > Mail > Stationery and Fonts.
-
Select the Font button for New mail messages or Replying or forwarding messages to change the default font, font size, and font color when composing or replying to messages.
-
Click OK twice to save your changes.

